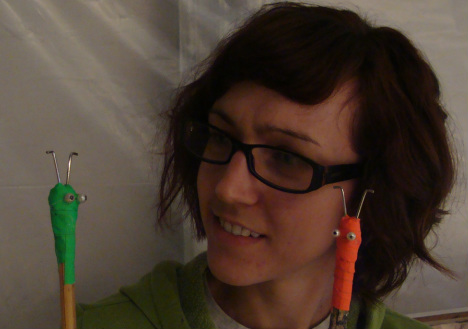
 This week, our exchange artist, Kira Nehmer and I have been hard at work on the scrims and backdrops for our upcoming production of "The Unfortunates." It has been a real pleasure working with and getting to know Kira, and I have learned so much from her. Among many things, she taught us how to make the ultimate scrim picks. The design comes from her Charge Scenic Artist, Jim Medved at the Milwaukee Repertory theater and involves hot-gluing the tines from a binder clip into a skinny cartooning sized bamboo and then securing them with gaff or in our case, colorful spike tape. They looked like little aliens to us, so we added eyeballs just for fun, but they would work just as amazing if you left them out.  In my previous blog, I talked about and showed the bounce drop being painted by Kira, Amanda and Erin. Kira and I dealt with the final darkening and touch up. Here's what we have to show for it! A nice 25% grey bounce to catch the light behind the scrims. Our scenic designer, Sibyl Wickersheimer loved the watercolor quality, and so do we! As I mentioned before, this show has so many layers and lighting effects. I can't wait to see them all together. 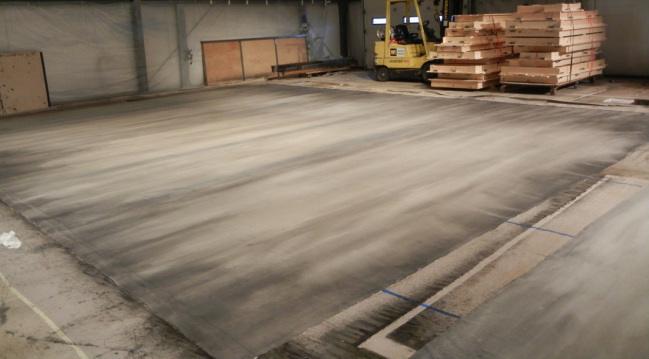  The scrims were similar to the bounce, but in dank colors of umbers and siennas. We brought in some of the greys and blues from the bounce to tie the two together. We used brushes to hold true to the brushy, panel-like qualities and garden sprayers to soften the overall look. 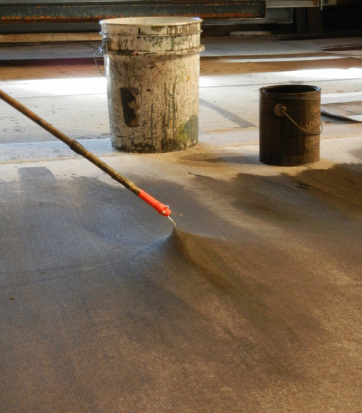 Here is one of our awesome scrim picks in use! 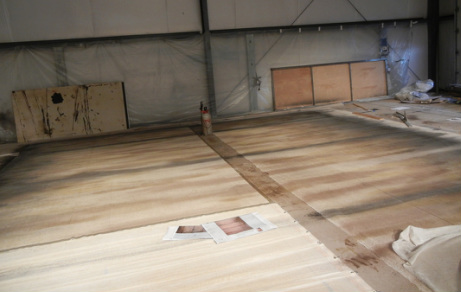 It is relevant to note that this process was extremely challenging due to the need to rep the scrims. Instead of being able to paint a full-stage sized scrim and hang it as is, we needed to paint it in pieces so that it could be taken apart and stored. The top panels were to be mounted permanently to hard scenery, and the lower panels to the far right and left were equipped with velcro, and are to be temporarily mounted to a hard frame, while the bottom center panels are pleated and flowing and to be put on traveller tracks. We needed precise measurements, allowing for extra runoff to be wrapped around the hard scenery. We also needed to do something I have never done before: paint a pleated scrim. This required a lot of moving the scrim around with our feet and spraying and painting it in sections so the folds would not leave hard lines when we sprayed them. 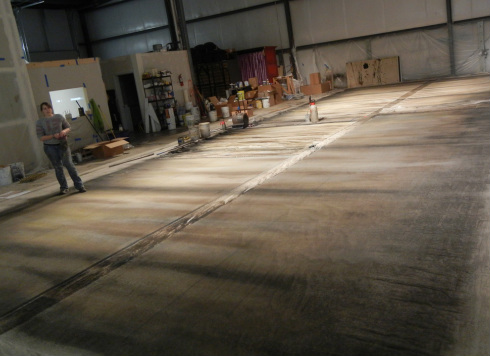 Here I am putting the final darkening spray around the edges of the scrim. Below: A detail shot of the finished scrim. 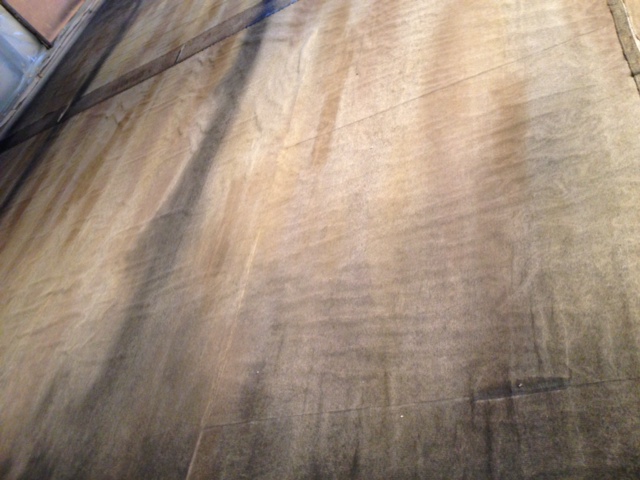 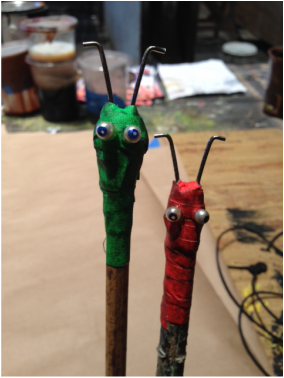 Ready for our next project!
2 Comments
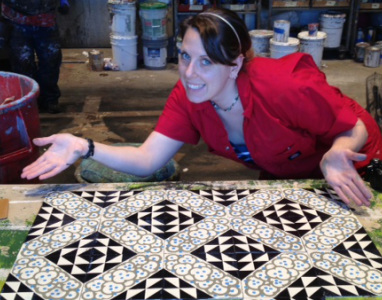 This week in the shop, we have been working VERY hard on our upcoming production of "The Unfortunates." A world premier musical, it promises to be moving, entertaining, frightening, and fun. From the OSF website: "A musical pilgrimage through uniquely American genres delivers five prisoners to salvation — or at least keeps the terror at bay. Facing an uncertain end, they bring to life the story of Big Joe, a tough bartender who risks everything to save the armless courtesan Rae from a deadly plague. Combining the heat of a gospel revival with the sweet sorrow of the blues, 'The Unfortunates' convinces us that any great challenge can be faced with dignity, grace, and compassion." 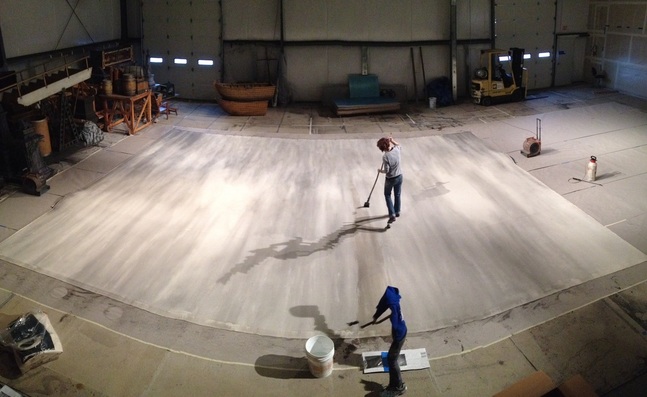 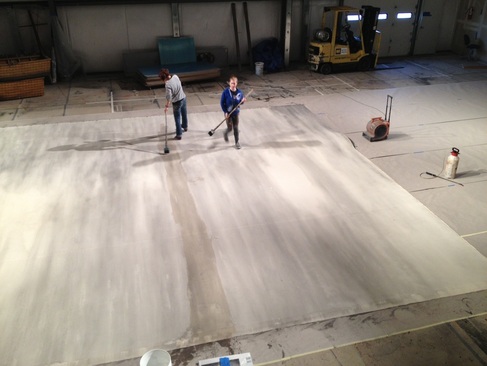 This show is filled with layers, including a backdrop, several scrims, a bounce, rear projection screens, and even a detailed tile floor. Here, you see Amanda Haverick, Kira Nehmer and Erin Young painting the bounce in an airy smoky print. In order to create the intricate tile pattern, we developed an assembly line of applying a vinyl stencil to each tile and rolling on the paint. The slideshow below shows scenic artists Amada Haverick, Kira Nehmer and I as well as our intern Erin Young laying out the tiles, applying the stencils using transfer tape, and adding the finishing paint strokes with a pencil eraser. First, the shop cut more than 700 individual tiles from masonite, a board made of woodpulp and glue, and sorted them into stacks to be painted in three different styles. Two are reletively plain, while the remaining 400 display a fairly intricate 5 color cloud and triangle pattern. To create this intricate pattern quickly and efficiently, we decided to use the vinyl cutter to create a stencil. The vinyl cutter is a fantastic tool in the likeness of a printer, but instead of printing with ink, the printer in equipped with a tiny knife that cuts a design into a giant vinyl sticker that we buy by the roll. The cutter can make many copies of the same sticky stencil very quickly and then all we have to do is apply the design to the tiles and paint them as we would a stencil. First, we remove the sections that are to be painted grey, and paint them, then remove more of the design and paint them the next color, blue, and so on. In this way, we can paint each color of each section and then finally remove the last of the vinyl, leaving a perfectly clean painted tile. Then we need to seal them to look glazed, and age them.
Since the tile floor belongs to a bombed out bar, the tiles needed to look old and broken. Now comes the fun part: In some cases, all we needed to do was chip the paint or let some of the vinyl rip some paint off leaving a burnt look, but in others, we actually got to break the tiles in half, or break off corners to give them a chipped look. All of the tiles will get an uneven brown grungy wash. The final look will be achived when they are mounted in the Thomas Theatre in their patterns around the traps in the floor to look like open holes left from a bombardment.  This week in the paint shop, we have been finishing up some loose ends on our upcoming production of King Lear. Here, you can see our Lead Scenic Thayne Abraham painting some faux rocks and coming down from heaven.  For the storm scene in the play, we wanted there to be a storm shelter (sort of Wizard of Oz style) that he could escape into. It was supposed to look like cement with flagstones stuck in it and an old wooden ladder. 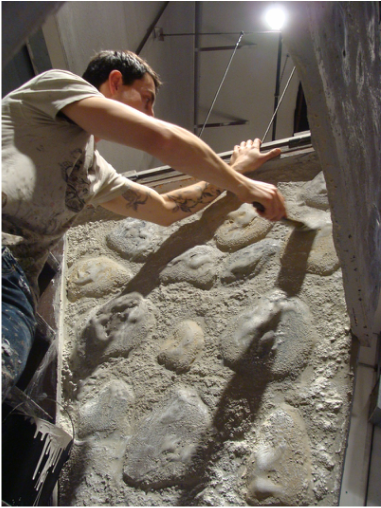 The stones were carved from foam, sanded and coated and then painted to give them all the essential highlights and shadows. Left, Thayne uses his favorite technique, dry brushing to bring out the high points and get the perfect highlight. The floor of King Lear was especially challenging and exciting. The entire play takes place on a giant antiqued mirror. Below, you can see a slideshow of our progress. We coated the floor with a near indestructable clear sealer that is industrially used to seal statues and airplanes, and got to work with rags and tinted sealer to create the levels of age at the edges. Scenic Designers can give a paint department several recources from which to work, but the most important, I feel is research. Research can be one or many images taken from books or magazines or the internet of examples of what he/she would like to see. They give us a better understanding of what is in the Designer's head and to get and idea of the feel of what we are painting. Another rescource is the Rendering, or an actual image created by the Designer of exactly what he/she wants to see. Every scrape, every dot of color is planned. We just make this image bigger. It was really interesting to really look at the way a mirror ages. It has so many different colors to it as the backing is peeled away. I really thought there would only be one- perhaps a muddy brown, or even a duller grey. But, as we studied the image, we found soft browns as well as gentle blues and even hot rusty reds and oranges. The shapes were very organic. We would lay down a glaze and let it set up and then polish some away with a rag or dry brush. Or sometimes we would wait for it to dry completely and scrub some away with a brillo pad or dab some away with alcohol on a cotton swab or rag. And in some instances, we crated a resist with water in a sprayer soon after laying color down. | ArchivesOctober 2013 
Leave a Comment!
I'd love to hear from you. |
| Cassandra Phillips |
|
 RSS Feed